

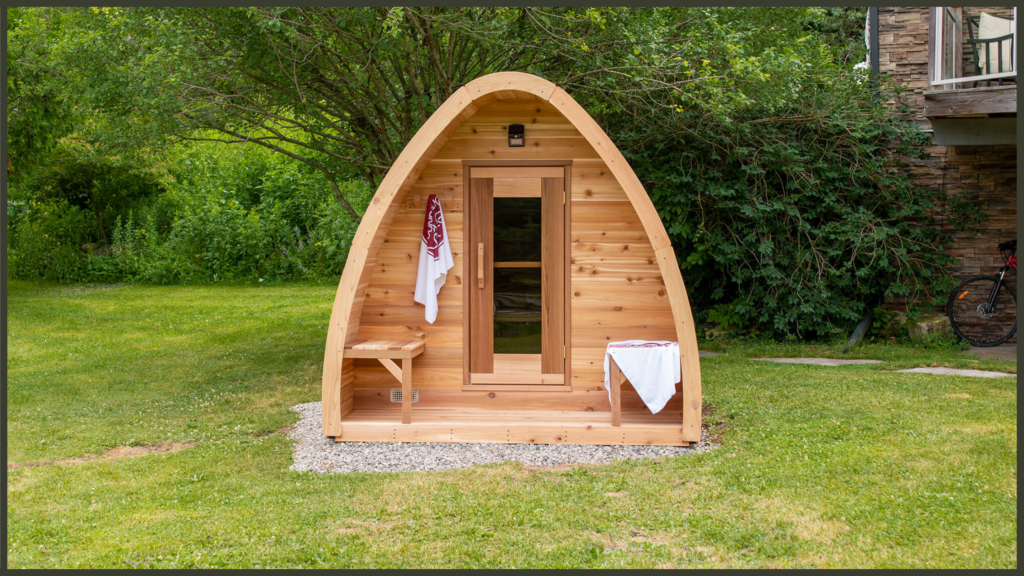
Stepping into a well-kept outdoor sauna is pure bliss. The scent of clean cedar and the steady heat make the perfect escape.
Caring for it takes very little effort. Because these structures are engineered to live outside through every season, looking after them involves a few simple habits rather than a massive annual project.
A little routine care keeps your space beautiful, safe, and ready whenever you are.
How much care a sauna really needs
Preserving your garden sauna takes only a few minutes after each session, a quick fortnightly tidy, and a seasonal check-up. Cedar is naturally durable, so your main focus is simply managing humidity, keeping surfaces clean, and checking structural fittings as the seasons turn.
Think of your maintenance routine in four quick layers:
- Post-Session: A two-minute airing and towel wipe.
- Fortnightly: A basic surface clean of the floor and benches.
- Seasonal: A spring and autumn check of the roof, base, drainage, and bands.
- Annual: A deeper clean, timber re-oiling (if treated), and a heater or chimney service.
How often you deep-clean comes down to use. We recommend a weekly clean if you are inside most days, or a monthly refresh if it is an occasional weekend treat.
Cleaning the inside
To keep your interior flawless, wipe down the benches after use and let the room air out completely. Every week or two, wash the surfaces with warm water and a specialised sauna cleaner, always working with the grain. Avoid bleach or aggressive chemicals, which discolour the cedar and release toxic fumes.
Post-Session Habits
Prop open the door and any adjustable vents when you step out. This allows damp, hot air to escape so the timber dries out evenly.
Wipe down the benches and backrests with a dry towel where moisture has gathered. A swift rinse with cool water clears away body oils without soaking the timber.
Periodic Interior Refreshing
Every fortnight, wipe the internal cladding down with warm water and a mild soap or dedicated sauna wash. This is especially vital if the space gets heavy, regular use.
Apply the cleaner along the grain, wipe away any residue, and leave it to dry naturally. Never use ammonia, bleach, or harsh disinfectants.
Managing Stains and Mould
Benches can pick up sweat stains or darken where skin meets wood. To lift them, sand the spot lightly along the grain with fine sandpaper (around 120 to 220 grit) then wipe away the dust to refresh the cedar. To prevent stains in the first place, sit and rest your feet on a towel.
Keeping mould away
Benches can naturally darken or pick up sweat stains over time. Lightly sand the area with fine-grit sandpaper (120 to 220 grit) along the grain to reveal fresh wood. To prevent stains from the start, always sit on a clean towel.
While cedar oils naturally resist fungal growth, trapped dampness can still cause mould. Run the heater for a short time after a humid session to dry the room, and keep vents clear. Scrub any spots away with diluted vinegar or a non-bleach remover, then boost your airflow.
To stain or leave it: finishing the cedar
Cedar requires no chemical treatments to last. Inside, leave the wood bare or use a clear, specialised penetrating oil. Never apply synthetic varnishes or sealers, as they trap moisture, blister under heat, and release harmful fumes.
On the outside, let the timber weather naturally into a classic silver-grey, or apply a penetrating oil with built-in UV protection to retain its original warmth.
If you choose to oil the exterior, apply two coats on a dry day above 10°C. Because penetrating oils do not peel, future maintenance coats every couple of years require zero sanding. Simply clean the surface and brush on a fresh layer. Store leftover oil indoors away from frost over the winter.
For modern designs with a glass facade or metal cladding, the exterior surfaces do not require oiling. Keep the panels and glass clean using mild soap and water, rinse them down, and monitor the seals.
Keeping the air moving
Excellent ventilation is the secret to a healthy, long-lasting sauna. By keeping both the low and high vents entirely unobstructed, you ensure the space dries out completely between sessions. This eliminates musty smells, mould, and premature wear on the timber.
These rooms are designed to breathe. Fresh air is drawn in through a low entry point near the heater, while rising air escapes through an upper vent on the opposite wall.
This continuous cycle dries the wood efficiently the moment your session ends. Ensure nothing blocks these pathways, and sweep away any drifted snow from external grilles during winter.
The heater and stones
Your maintenance routine depends on your chosen heat source. Electric systems rely on loosely distributed stones that need replacing as they degrade. Wood-burning stoves require regular ash removal, seasoned firewood, and annual flue sweeps. For both setups, leave intricate electrical or chimney repairs to certified professionals.
Electric Heaters
Stack your stones loosely, placing larger stones at the bottom and smaller ones on top, so heat and air flow freely. Never pack them tightly or allow them to press against the elements.
Once a year, turn off the power at the isolation switch, wait for the unit to cool, and gently brush any dust off the elements without using water. Always use approved sauna stones and hire a licensed electrician for any wiring work.
Wood-Burning Heaters
Empty the ash pan before lighting a fire to ensure a proper draw, and strictly burn seasoned, dry hardwood. Using wet or unseasoned logs accelerates dangerous creosote buildup in the flue.
Keep the stove door firmly shut during operation and wipe down the glass if it becomes cloudy. Clean the internal heating plates after every 15 to 20 uses, and arrange a professional chimney inspection at least once a year. Creosote poses a serious fire risk. Install a carbon monoxide detector nearby.
Care for Sauna Stones
Choose durable, dense stones designed specifically for sauna use and rinse them before loading them for the first time. Once a year, take them out to remove small fragments and dust, then restack them loosely. Replace cracked or crumbling stones every year or two to keep your steam performance high.
The shell: bands, roof, and base
The cedar shell mostly looks after itself. On a barrel sauna, tighten the bands after the first month of use and adjust them as the seasons change. Keep the roof clear of debris, inspect the door seals, and ensure the entire unit sits on a stable, draining foundation.
Wood Movement and Band Adjustments
Cedar naturally expands and contracts as it reacts to atmospheric humidity. During damp seasons, the timber swells and tightens against the metal bands. In dry conditions, the wood shrinks slightly, which can occasionally create minor gaps between the staves.
Tighten the bands using a wrench or drill after your first month of ownership, and check them every spring and autumn to ensure they remain snug. It is a simple two-minute job.
Roof, Door, and Base Foundations
Examine the roof each season. Rubber membranes only need an occasional wash with mild soap, while cedar shingles should be kept free from leaves and debris. Check metal roofs for tight fasteners and secure seams. Rake heavy snow off any roof with a gentle, non-scratching tool. Check that the door aligns correctly and seals tightly to prevent heat loss.
Your sauna must sit on a level, solid base with excellent drainage, such as a concrete pad, a heavy-duty deck, compacted stone, or paving slabs. A very slight slope away from the door helps shed rainwater effectively. Creating a base slightly larger than the sauna itself keeps the lower timbers clear of standing puddles and melting snow, protecting the wood from rot.
Sauna care through the seasons
Outdoor saunas are engineered for year-round enjoyment, meaning seasonal care is simply a matter of timing. There are no intricate plumbing systems to drain down or winterize.
- Spring: Time for a thorough refresh. Deep clean the interior, wash the exterior gently with a soft brush and mild soap (never use a pressure washer), check the tension of the bands, and inspect the roof seals. Re-oil the exterior if the colour has faded.
- Summer: Minimal effort required. Maintain your regular cleaning habits, run the heater briefly after heavy downpours to drive out moisture, and check for any nesting insects around the vents or chimney. This dry, warm season is the perfect time for exterior oiling.
- Autumn: Prepare for the harsh winter months ahead. Check the band tension as the timber contracts in the cooler air, inspect the door gaskets, and schedule your professional chimney sweep. Clear fallen leaves away from the roof and base.
- Winter: Keep the entrance, vents, and flue clear of ice and snow, and allow a little extra time for the room to reach temperature. Never leave water inside to freeze, dry the room thoroughly after use to counter condensation, and keep the surrounding steps safe and ice-free.
When something’s not right
Most minor sauna problems have straightforward solutions. If the room is slow to heat, look for worn door seals, blocked air vents, or overly packed stones. Musty odours mean the space needs to be dried out, and loose structural bands just need a quick adjustment.
- Insufficient Heat: Check for gaps in the door seals, inspect the ventilation, and ensure stones are stacked loosely. Account for longer heat-up times in freezing weather.
- Uneven Temperatures: Rearrange the stones to restore airflow and adjust your wall vents.
- Musty Scents: The timber needs to dry. Run a hot cycle with the vents wide open, clean the surfaces, and burn off any debris on the stones.
- Sticking Door: This is caused by temporary seasonal swelling. Adjust the hinges slightly to correct the alignment.
- Loose Tension Bands: The cedar has shrunk in dry weather. Tighten the hardware with a wrench.
- Weak Steam: The stones are likely worn out or clogged with dust. Clean, rearrange, or replace them.
For serious heater electrical faults, signs of chimney issues, or structural water leaks, stop using the unit immediately. Contact a qualified professional or your local specialist. All electrical adjustments must be completed by a certified electrician.
With this simple care routine, a premium cedar sauna will easily provide 15 to 30 years of exceptional performance, keeping your wellness ritual perfect for decades to come. Ensure you follow your specific model’s care guidelines to keep your warranty fully intact and protected.